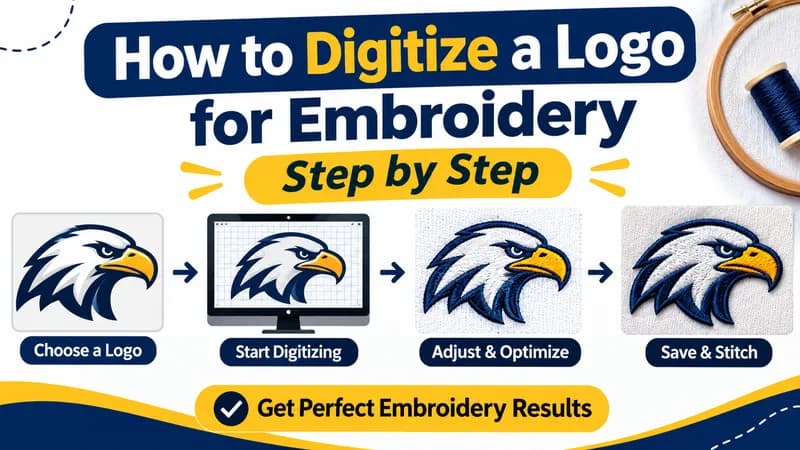
How to Digitize a Logo for Embroidery Step by Step
To digitize a logo for embroidery, you convert the artwork into a stitch file. You choose stitch types, set the size and density, plan the stitch order, test the design and export it in your machine format such as DST or PES. Beginners can learn this with software, but detailed logos are often faster and cleaner when a professional handles them. You can also read our logo embroidery digitizing guide for a wider overview.
Embroidery machines cannot read a normal image file. They need instructions that tell the needle where to go, which stitch to use and when to change color. Digitizing creates those instructions. The steps below walk through the full process so you know what happens behind a clean embroidered logo.
Step 1 Check your artwork
Start with the best artwork you have. Vector files such as AI, SVG or EPS are ideal because they have sharp edges and clean shapes. If you only have a PNG or JPG, use the largest and clearest version. Remove shadows, gradients and tiny details, because thread cannot reproduce them.
Step 2 Decide the final size and placement
Size changes everything in digitizing. Left chest logos are commonly about 3 to 4 inches wide, and cap front logos are commonly about 2 inches tall. Check our hat embroidery size chart before you set a size for caps. Text that looks fine on screen may be too small to stitch, and a safe guide is to keep letters at about a quarter inch tall or larger.
Step 3 Reduce the colors
Each color means a thread change, which adds time and cost. Simplify the logo to the fewest colors that still look right, and match each one to a thread shade. Clean color blocks stitch better than blended tones.
Step 4 Choose the stitch types
• Fill stitch covers larger areas with rows of stitches.
• Satin stitch suits borders, lettering and narrow shapes.
• Run stitch makes thin lines, outlines and fine details.
Wide areas are usually filled because long satin stitches can snag. Narrow shapes work better in satin. Choosing the right type for each part of the logo is where digitizing skill shows.
Step 5 Add underlay and pull compensation
Underlay is a layer of foundation stitches that holds the fabric and supports the top stitches. Pull compensation widens shapes slightly to offset the way thread pulls the fabric inward. Without these settings, edges look thin and the design can pucker.
Step 6 Set the density
Density is the spacing between stitches. If stitches are too close, the logo feels stiff and can cause thread breaks. If they are too far apart, the fabric shows through. The right density depends on the fabric, the thread and the design.
Step 7 Plan the stitch order
The order of stitching affects quality and speed. A good sequence reduces jumps and trims, stitches background shapes before details and keeps registration tight. Poor ordering causes gaps, extra trims and longer run times.
Step 8 Test stitch and adjust
Always stitch a test on the same fabric and stabilizer you will use for production. A design that looks perfect on screen can pucker or leave gaps on real fabric. Adjust density, underlay or size based on the test, then stitch again if needed.
Step 9 Export the right file format
Save the final design in the format your machine reads. Common formats include DST, PES, EXP and JEF. Run the file once on your machine before starting a large order to confirm that colors and stops are correct.
Common logo digitizing mistakes
• Starting from a low resolution image.
• Making text too small to read when stitched.
• Using too many colors.
• Skipping the test stitch.
• Using the same file for caps and flat garments. Caps need different settings, and our notes on hat digitizing cost explain why.
• Ignoring special effects. A raised logo needs its own plan, as shown in our 3D puff embroidery guide.
Should you digitize it yourself or hire a pro
If you enjoy learning and have time, software can teach you the craft, but expect several test runs before results look professional. If you need clean files quickly or the logo has small text and fine detail, hiring a professional saves time and wasted garments. You can review our logo digitizing service and current digitizing prices to compare both routes.
Frequently asked questions
Can I digitize a logo for free?
Free tools exist, but they usually produce basic results that need manual cleanup. They can work for very simple shapes. Detailed logos need more control.
What file should I send to a digitizer?
Send a vector file if you have one. Otherwise send the largest, clearest PNG or JPG, along with the final size, fabric type and machine format.
How long does it take to digitize a logo?
It depends on complexity. A simple logo is quick for an experienced digitizer, while a detailed one needs more time for setup and testing.
Do I need a new file for caps and shirts?
Yes in most cases. Caps and flat garments behave differently, so the same logo usually needs separate settings for each.
How much does it cost to digitize a logo?
Cost depends on stitch count, complexity and turnaround. See our embroidery digitizing cost guide for a full breakdown.
Send us your logo
Want a clean, machine ready file without the trial and error? Send your logo to our team and we will review it and send a quote. Visit our embroidery digitizing services page or contact us to get started.